Witajciie fani Studio 75! Z tej strony Tracey, przychodzę do Was z dekoracją do domu, którą wykonałam używając cudownej kolekcji Hello Spring i serca z Woodouts!. Ta kolekcja ma śliczne kolory i piękne elementy do wycinania.
Hi dear Studio75 fans!! It's Tracey back with a home decor project featuring the fabulous Hello Spring Collection on a fabulous Woodouts heart base. This collection has such gorgeous colors and amazing images to fussy cut.
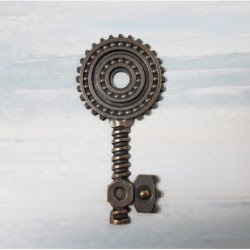
Uwielbiam dodawać drobne dodatki w stylu Steampunk do moich delikatnych projektów, a ten metalowy klucz z naszego sklepu jest idealny. Koniecznie zobaczcie moje podpowiedzi i porady poniżej na to jak zalterowałam tek klucz, aby ładnie pasował do całej kompozycji.
I just adore adding a touch of steampunk to my soft, feminine projects, and this Metal Key from the store is so perfect here. Be sure to check out my tips and techniques below to see how I altered the key to coordinate so beautifully.
Tips and Techniques
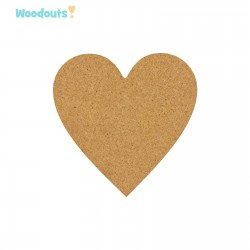
Wykorzystałam gel medium żeby przykleić papier Hello Spring na uroczą bazę serce z Woodouts! Często gdy przyklejam papier do twardych powierzchni pojawiają się miejsca, gdzie papier nie jest dobrze przyklejony i tworzą się takie nieładne bąble. Pomyślałam, że dobrym pomysłem będzie posmarować pędzlem obie strony papieru przezroczystym gesso. Pomogło to przykleić papier dużo lepiej. Wycięłam kawałek papieru większy niż serce i posmarowałam z dwóch stron przezroczystym gesso. gdty wszystko wyschło zabrałam się za przyklejanie papieru do bazy. Tylnią część papieru oraz front bazy wysmarowałam gel medium i połączyłam. Żeby mieć pewność że wszystko ładnie się połączyło położyłam jeszcze czysty kawałek papieru do drukarki na serduszku i ładnie wszystko wygładziłam. Poczekałam cały dzień, aż wszystko ładnie wyschło, a następnie docięłam papier wystający poza brzegi serca specjalnym nożykiem do papieru. Następnie zeszlifowałam krawędzie żeby wszystko wygładzić.
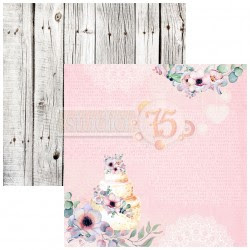
I used soft gel medium to adhere Hello Spring 01 paper to this sweet Woodouts Heart. I often have areas that bubble or don't adhere well when applying paper to hard surfaces. I thought of the idea to brush the front and back of the paper with clear gesso first. It really helped the paper to go on much more smoothly. I cut a piece of paper a little larger than the heart, brushed both sides with clear gesso and allowed to dry completely. Once dry I brushed both the back side of the paper and the front of the Woodouts Heart with soft gel medium and placed the two coated sides together. To make sure the paper was securely attached, I placed a piece of computer paper over the paper covered heart (to prevent transferring any bits of leftover paint from the brayer onto my beautiful paper), then rolled firmly over the entire surface with a brayer. I let it sit overnight for the gel medium to dry completely, then trimmed closely with a craft knife. Finally I sanded the edges to get a nice smooth finish.
Nałożyłam perłową Iceing Paste przez maskę. Prawda że piękny jest ten wzór maski? Popryskałam też całość białym tuszem, tworząc małe plamki.
I applied pearl icing paste using the SnipArt Up In the Air Damask Stencil. Isn't this such a gorgeous design? I also spattered white drawing ink over the paper.
Żeby zbudować kompozycję, nakleiłam warstwowo, serwetkę, tekturki i trójwymiarowe kwiaty. Napis potuszowałam żeby pasował wyglądem do pozostałych elementów.
To build the cluster I layered vintage lace, then chipboard and dimensional flowers. I cut gorgeous flowers and leaves from Hello Spring 06 and Hello Spring 07 and layered them into the edges of the cluster.
The sentiment is rubbed with ink to coordinate with the gorgeous lavender in the fussy cut flowers.
Na pięknej , delikatnej ramce zrobiłam embossing na gorąco, następnie żeby kolor stał się troszkę bardziej subtelny użyłam wosków w kilku kolorach.
The delicate Anemone Dahlia Frame is heat embossed with aged scarlet embossing enamel, then to soften the color, I rubbed with art wax in several colors including rose gold, vintage gold, white gold, and rose.
This metal key is rubbed with rose gold and vintage gold to give it a lighter and more feminine feel. I also added a sparkling gem to the center and several more around the heart.
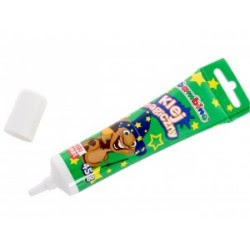
Bambino Glue is used to apply lavender and pearl prills for added texture. It dries clear and is perfect for adding delicate texture materials.
A close-up of the sweet little butterfly and you can see the damask texture here nicely as well.
Na zbliżeniach możecie dokładniej przyjrzeć się detalom tej pracy: pięknym koronkom, wzorowi z maski, tekturkom i wielu kolorom które użyłam.
Another view of the top corner where you can see beautiful lace, and a closer view the beautiful images I fussy cut. You can also see the lovely variation in color on the chipboard.
Studio75 Supplies


Dziękuję, że zajrzeliście! Mam nadzieję, że Was zainspirowałam, żebyście chwycili za swoje przybory do tworzenia ze Studio 75 i stworzyli piękną dekorację do domu.
Thanks for stopping by today! I hope you've been inspired to grab your
Studio75 products and create a beautiful home decor piece.
~ Blessings ~
Tracey


Brak komentarzy:
Prześlij komentarz