Pokazywanie postów oznaczonych etykietą vintage. Pokaż wszystkie posty

środa, 21 sierpnia 2019

Balon w stylu steampunk od Tracey / Steampunk Hot Air Balloon with Tracey

Hello dear Studio75 fans. It's Tracey back with a new project to share. I altered this amazing Woodouts Balloon Mixed Media Base with mixed media products and a combination of Scrapiniec Chipboard, Mitform Castings metal pieces, moulded shapes and vintage pieces from my stash to create this fabulous steampunk home decor piece. Check out all the details below in the tips and techniques section with lots of close-ups.


Tips and Techniques
 To add texture to the background of the Woodouts Balloon Mixed Media Base, I applied plaster paste through the SnipArt Up In the Air Damask Stencil. I just adore this design, and it has become of my favorite go to stencils these days. Once dry I spritzed with blue color mist then a small amount of beige and copper. I also misted with water to help the colors move and blend.

 
I just adore these Mitform Casting pieces. The Steel Padlock piece on the left is from the Studio75 store. The fabulous metal pieces available in the store can be found HERE. I rubbed the metal pieces with brass, bronze, and teal art wax to age with a little patina.

 I adore going to a large community yard sale with my sister every year, and I am always on the lookout for items I can use for my art pieces. This cool spark plug is one of my finds. The other metal pieces in this close-up are a combination of bought gears, and bolts along with pieces that I moulded, painted, and waxed to give this vintage patina effect. I also added art wax to the metal parts of the spark plug.

 
 More rusty goodness including rusty washers I've picked up on when I find them laying on the ground when I'm out and about along with vintage keys - another yard sale find.

 
This cool pressure gauge is also one of my finds. Doesn't it fit perfectly into the notch on the Mitform Castings Steel Padlock? A little moulded sprocket on the gauge adds to the steampunk feel.

 
 These fabulous Scrapiniec Chipboard Steampunk Flying Hearts XL Wings are a perfect fit across the Woodouts Balloon! I painted them with a mix of brass and teal paints, then rubbed with metallic art wax to add to the grungy aged metal effect.

 
 The Scrapiniec Focus Small Arrows were a perfect fit around this vintage drawing compass, and also added a few Scrapiniec Confetti Stars below the wings. These chipboard pieces were finished with the same products as the wings. I dyed some cheese cloth with the color mists and to tuck in for added texture. As I glued down the metal elements, the cheesecloth was secured in place. 

I brushed a mix of rusty/patina paints around the metal objects and spritzed with water so that it looks like they have been there and weathered to rust in place.

These faux metal chains are also from the Scrapiniec Steampunk Flying Hearts XL Elements set. Isn't it amazing how paint and waxes can make them look just like aged metal? I used a couple more Mitform Casting pieces to give definition to the balloon basked and added a vintage couple into the opening to enjoy the flight.

 
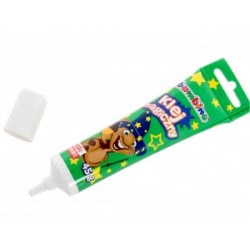
I used Bambino Glue to adhere beaded texture in place. Because it dries clear, it the perfect adhesive for these little bits of texture.

Studio75 Supplies
 https://studio75.pl/en/4372-22x30-cm-balloon-mixed-media-base.html  https://studio75.pl/en/5227-dziurka-mechanizm-45mm.html 

https://studio75.pl/en/3442-up-in-the-air-damask-stencil-15x15.html  https://studio75.pl/en/1979-focus-big-arrows-duze-strzalki.html 

https://studio75.pl/en/2077-steampunk-duza-ramka-z-sercem.html https://studio75.pl/en/2064-confetti-serduszka.html 

https://studio75.pl/en/2651-klej-magiczny-w-tubie-45g-bambino-stmajewski-5903235004070.html 

 Thanks so much for stopping by today!

I hope you've been inspired to create a steampunk project
with one of your Studio75 Woodouts pieces!

~ Blessings ~


https://gracescraps.blogspot.com/

poniedziałek, 21 maja 2018

Okładka Art Journal w stylu Vintage / Vintage Art Journal Cover

Witam,

Na dziś przygotowałam dla Was okładkę art journala w stylu Vintage z wieloma koronkami. 
Pracę wykonałam na albumie w sztywnej okładce z beermaty, oklejonej dodatkowo papierem. Baza jest bardzo solidna, bardzo dobrze sprawdza się przy pracy z mediami. 
Zaczęłam od przygotowania tła pod kompozycję. Najpierw przykleiłam papier z kolekcji Cherry Blossom używając gel medium, ale spokojnie można do klejenia papieru użyć też kleju. Następnie rozbieliłam całą okładkę białą farbą akrylową z Cadence. 

Żeby dodać ciekawszej tekstury wykorzystałam gazę, można również wykorzystać do tego celu maski i pastę strukturalną.  

Do dekoracji wykorzystałam metalowe elementy takie jak zegar i nożyczki oraz jasno beżowe guziki. 

Cały proces tworzenia okładki możecie zobaczyć na video tutorialu. 


For today I prepared for you an art journal in Vintage style with many laces.
I made the project on an album in a hard  cover of beermatts, additionally covered with paper. The notebook base is very solid, it works very well when working with the media.

I started by preparing the background for the composition. First, I glued the paper from the Cherry Blossom collection using the gel medium, but you can easily use the glue to glue the paper. Then I lightened the whole cover with white acrylic paint from Cadence.

To add a more interesting texture, I used gauze, and you can also use a mask and structural paste for this purpose.
For decoration I used metal elements such as clock and scissors and light beige buttons.

You can watch the  entire process of creating the cover on the video tutorial.


Materiały: / Supplies:


Zapraszam Was serdecznie do udziału w naszym aktualnym wyzwaniu
"Wycinanki"
I encourage you to take part in our current challenge "Fussy Cutting" 


Miłego dnia:)
Have a nice day :) 


poniedziałek, 26 lutego 2018

Kartka Vintage z kolekcji Cherry Blossom / Vintage card with Cherry Blossom collection

Witajcie,


Na dziś mam dla Was kolejny projekt z naszych nowych papierów Cherry Blossom. Ta kolekcja, tak bardzo mi się spodobała, że ciężko mi ostatnio zabrać się za pracę z jakimiś innymi papierami. Ostatnio zrobiłam dla Was ukwieconą kartkę i tym razem również nie zabraknie kwiatów. Pojawi się natomiast znacznie więcej warstw i dodatków.

Kartka jest złożona z wielu warstw papieru przyklejonych na klej lub piankę i taśmę dwustronną. Dzięki używaniu pianki i kleju udało się stworzyć kompozycję piętrzącą się ku górze, zbudowana z wielu warstw i wielu elementów. 

Jak zwykle przed robieniem projektu przygotowałam sobie różne materiały i na ich bazie tworzyłam całość. Prawie nigdy nie działam na podstawie planu. Pozwalam, żeby papier i dodatki poprowadziły mnie we właściwym kierunku. 

Zrobiłam też kurs video i mam nadzieję, że Wam się zpodoba.

For today I have another project for you from our new Cherry Blossom papers. I like this collection so much, that it's hard for me to get to work with some other papers lately. Recently I made a floral card for you, and this time there will also be many, many flowers but there will be much more layers and additions.

The card is composed of many layers of paper glued on the glue or foam and double-sided tape. Thanks to the use of foam and glue, it was possible to create a composition that was rising up, built of many layers and many elements.

As usual before preparing a project, I prepared various materials and created my project on their basis. I almost never work on the basis of a plan. I let paper and accessories lead me in the right direction.

I also made a video tutorial and I hope you'll enjoy it.


Miłego dnia!
Have a nice day!


środa, 5 października 2016

You are not old, you are vintage card by Virág

Hi My Crafty Friends,

I am not a card maker, but I really like to challange myself to prepare card to different occasions. 
My latest card is made for a birthday. I used Alice's Dreams collection as a base and some cuts for layering behind the composition. Thanks to the beautiful flower patterns of the paper I can cut out some more decoration elements. 

Witajcie,
nie jestem projektantką kartek ale lubię stawiać sobie wyzwania i tworzyć kartki na różne okazje. Moja ostatnia kartka jest przygotowana na urodziny. Użyłam kolekcji Marzenia Alicji jako bazy oraz wyciętych elementów jako warstwy w kompozycji. Dzięki pięknemu kwiatowemu motywowi na papierach mogłam wyciąć dodatkowe elementy dekoracyjne.


Here are some close ups:


Products I used:


Thank you for stopping by!
See you next time. 

Hugs,

Dziękuję za odwiedziny!
Do zobaczenia następnym razem.
Uściski,